Introduction
Today, I tested the basic features of swift, a programming language used to create applications for apple products. XCode was used in this process, where I used the iPhone 13 Pro environment for the programming. The primary focus was on the visual aspects, rather than functions.
View (or any other topic you want to write about)
import SwiftUI

struct ContentView: View {
    var body: some View {
        Text("난이도가 올라 갈 수록 \n점점 어려워집니다. \n\n당신은 어디까지 올라 갈 수 있나요?") // 1. Text input of the code
            .font(.system(size: 24, weight: .bold, design: .default)) // 2. font size, style and type
            .foregroundColor(.teal) // 3. Text Color set as teal
            .underline() // 4. Underlining the Text
            .italic() // 5. Text Italicize - does not work for Korean Font
            .multilineTextAlignment(.center) // 6. Text position at center
            .background(Color.red) // 7. Background Color of cell
            .padding() // 8. Add space around the content in the cell
    }
}
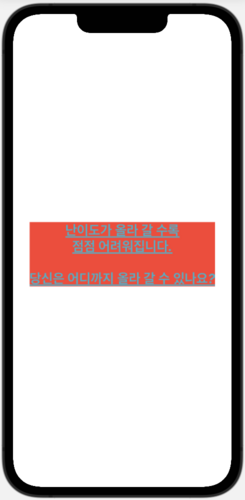
Creating a basic text cell, with applying different texual features.
Shape
struct ShapeTutorial: View {
    var body: some View {
        RoundedRectangle(cornerRadius: 30) // 1. Sets a circular shape at the corners
            .stroke(Color.blue, lineWidth: 30) // 2. Draws a line along the path using the current drawing properties.
            .foregroundColor(.blue)
            .frame(width: 200, height: 100, alignment: .center) // 3. Sets the size and position of the shape.
    }
}
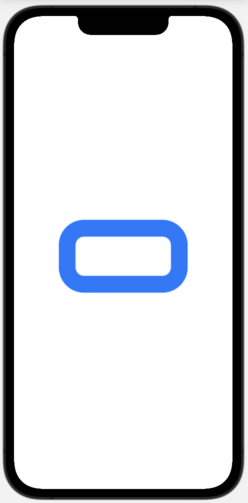
Creating a basic shape, while also adding decorative features such as borders, color and size.
Image
struct ImageTutorial: View {
    var body: some View {
        Image("duck")
            .resizable() // 1. Allows the image's size to be modifed
            .scaledToFill() // 2. Scales the object to fill its cell, maintaining this view's aspect ratio
            .frame(width: 300, height: 200) // 3. Sets the cell size
            .clipShape(Circle()) // 4. Sets the shape of the image
    }
}
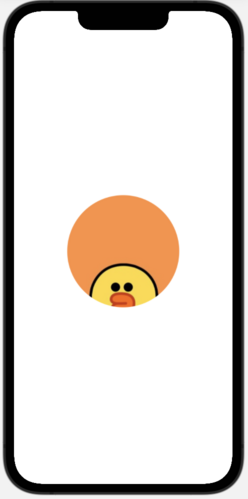
Added a image in the center, using different cell shapes for the image.
Button
struct ButtonTutorial: View {
    var body: some View {
        Button {
            print("Button tapped") // 1. Result when button tapped
        } label: {
            Text("Start!")
                .font(.system(size: 40, weight: .bold, design: .default))
                .foregroundColor(.green)
                .frame(width: 300, height: 100)
                .background(.yellow)
                .cornerRadius(24)
                .overlay( // 2. Place elements on top of images
                    RoundedRectangle(cornerRadius: 24) // 3. Places a rectangle with round corners
                        .stroke(Color.red, lineWidth: 10)
                )
        }

    }
}
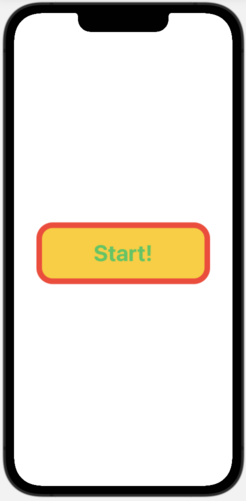
Created a button for the user, with decorative elements.
Stack
struct StackTutorial: View {
    var body: some View {
        VStack { // 1. Vertical stack, allows the objects to be stacked vertically
            Text("피카소의 색감")
                .font(.system(size: 40, weight: .bold, design: .default))
                .foregroundColor(.teal)
                .multilineTextAlignment(.center)
            Spacer() // 2. Pushes all elements downwards

            Image("color_game")
                .resizable()
                .scaledToFill()
                .frame(width: 200, height: 200)
            Spacer()

            Text("다른 색을 찾으세요!")
                .font(.system(size: 30, weight: .bold, design: .default))
                .foregroundColor(.teal)
                .multilineTextAlignment(.center)
            Spacer()

            Text("난이도가 올라 갈 수록 \n점점 어려워집니다. \n\n당신은 어디까지 올라 갈 수 있나요?")
                .font(.system(size: 24, weight: .bold, design: .default))
                .foregroundColor(.teal)
                .multilineTextAlignment(.center)
        }
    }
}
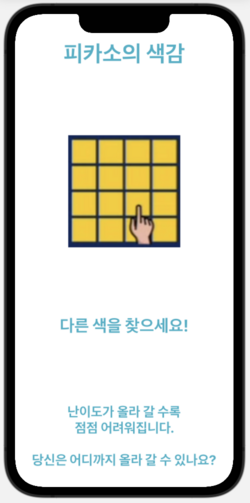
Used the stack function to stack different objects created beforehand.
Stack Extended
struct hw1: View {
    var body: some View {
        ZStack{ // 1. Forward stack, allows the objects to be stacked on top of each other
            Color.yellow // 2. Sets a yellow background, stacked on the bottom
            VStack{
                HStack{ // 3. Horizontal stack, allows the objects to be stacked horizontally
                    Image("duck")
                        .resizable()
                        .scaledToFill()
                        .frame(width: 100, height: 100)
                        .clipShape(Circle())

                    Text("Pepe, the duck")
                        .font(.system(size: 20, weight: .bold, design: .default))
                        .foregroundColor(.teal)
                        .multilineTextAlignment(.center)

                    Spacer()

                }
                HStack{
                    Image("duck")
                        .resizable()
                        .scaledToFill()
                        .frame(width: 100, height: 100)
                        .clipShape(Circle())

                        .overlay(Circle()
                            .stroke(Color.blue, lineWidth: 7))

                    Text("Pepe, the duck")
                        .font(.system(size: 20, weight: .bold, design: .default))
                        .foregroundColor(.teal)
                        .multilineTextAlignment(.leading)


                    Spacer()

                }
                Spacer()
            }
            .padding(30) // 4. Border size of 30 of the application
        }

    }
}
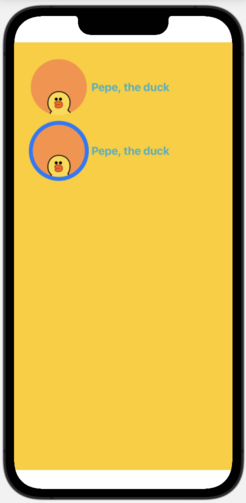
Used a greater variety of stacks, including those in all three directions (vertical, horizontal, stack-on-top).
Conclusion
Through these experimentations with swift, I was able to create several screens of applications screens, with considering visual elements for the user. While certain functions are limited in the Korean language, most of the functions were available as shown above. Later, this should extend to switching between screens through user control (buttons).